Most of North America is in a deep freeze, but the opening of Major League Baseball spring training across Florida and Arizona is always a sure sign that winter is nearly over.
Summer is just around the corner and we have some helpful tips to get your grill ready for the season.
Here are a few pointers to have your grill in mid-season form before for the dog-days of summer hit:
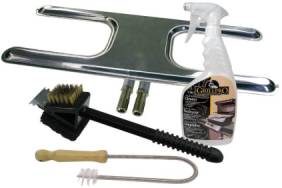
Get your tools ready:
- Sturdy bristle brush
- Barbecue grill cleaner
- Toothpicks
- Soap and water
- Venturi brush
Step 1
Remove all the cooking grids, vaporizers and burners and use a sturdy bristle brush to remove the build-up of grease or ash on the inside of the oven. Using a barbecue cleaner scrub the inside and outside of the oven and then rinse with water. Never use oven cleaner on your barbecue, it is corrosive and can damage the other components.
Step 2
Inspect the burners making sure there are no holes rusted through any of the components. If there are, it’s time for a replacement. Clean out any clogged ports using a toothpick, being careful not to damage the ports. Check all igniter contacts to ensure they are not corroded or loose and remove any debris from the electrode. Next, clean out the venturi tubes using a venturi brush. It’s very important to keep these tubes clean, Spiders love to make nest in these tubes, creating blockages that can cause serious damage.
Step 3
Examine the heat medium, if you have a heat plate remove any grease build-up and make sure there are no holes rusted through. If you have briquettes make sure they aren’t crumbling and the pores aren’t clogged with grease.
Step 4
Check the cooking grids and make sure no welds are broken and brush off any stuck on residue. If you have cast iron cooking grids, season them with oil to help keep food from sticking and help prevent rust. Cooking on Cast Iron? Take care of it
Step 5
Inspect the gas hose to make sure there aren’t any cracks or leaks. This can easily be done by preparing a soapy solution and applying it to the connections at the tank and valve. Turn the tank on slowly and watch for bubbles to form, which indicates that there is a leak. Try tightening the connections and re-test. If persistent leaking or blistering is detected, the gas assembly should be replaced. Visit your local Broil King dealer for help
Finally, check the condition of your control knobs, thermometer, and handles. Replacing small items like this can refresh your grill and make it look new again.
This blog is courtesy of our friends at Broil King. More grill maintenance tips are available online at www.broilkingbbq.com


